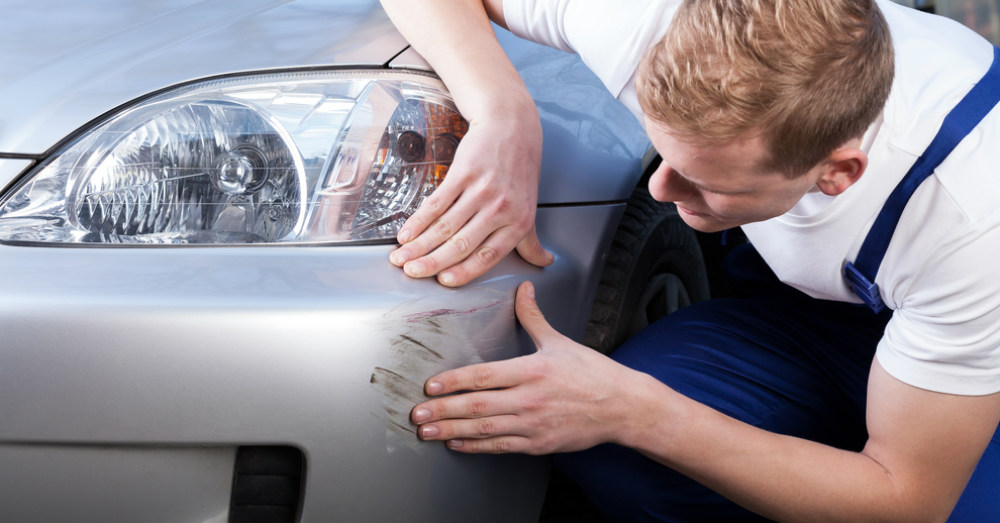
Fix Your Scratches
It’s not as if your vehicle somehow developed an itch that caused it to have scratches and abrasions on the paint these imperfections that now show up on your vehicle are the result of the driving you do on a daily basis. You can get rid of some of the minor scratches and dings that happen on the road when you have the right products to handle the job for you. When you compare the difference between buying nearly $50 worth of supplies compared to the cost of an entire repainting the right choice is the fixing of the scratches on your vehicle.
Supplies – In order to properly fix the scratches and dings on your vehicle you need the right set of supplies. This means knowing the color code of your paint and buying the kit that you need. This kit includes prep solvent, rubbing compound, sandpaper, rubber gloves, a tack rag, pretaped plastic, cans of primer, base coat and clear coat. This is not a small undertaking when you’re looking to fix the scratches on your vehicle, but it can help you have a great looking vehicle and avoid the need to have the paint job completely redone.
Abrasion – Before you can make the area look better, you have to make it look worse. You do this by sanding down the area around the scratch to the metal in order to build it back up. This is done by using 180-grit sandpaper which is heavy enough to remove some of the paint in the surrounding area to help you have the space prepared to rebuild it the right way and get the paint and look for the vehicle brought back to the way it should be when you’re fixing the paint and the appearance of your vehicle.
Priming – The primer that you have should be tinted and sandable. This should resemble the original paint color of your car and you can do this with three coats or more. You need to wait five to ten minutes between each coat in order to make sure it dries before applying the next coat. You’ll spend a couple minutes painting and then wait in order to get the look that you’re after with this initial step to bring your paint back to the look it should have. This means you should have a few drinks ready for you to enjoy during the process of this paint job.
Coating – With a solid layer of tinted primer on your affected area you’ll be able to start to use the base coat that helps to provide the pigment and protective layers of the paint to make sure your car will begin to look like it should once again. With this process, you need to sand in between layers of paint with at least a 1500-grit wet/dry sandpaper that is wet and has been soaked in water. As you add each layer of pain the vehicle will come closer to being completely finished and look more like a clear factory finish.
Clear Coat and Buffing – Once you apply the clear coat, you need to allow it to dry overnight. After this, you can apply a rubbing compound that will bring out the shine of the vehicle. Use the orbital sander to help blend in the new color to the old because your new paint will probably look better than the old that’s been on the vehicle for a long time. A proper wax job of the vehicle will help it blend in properly as well and then you can buff it out with the orbital buffer which should allow it to blend in the best.
This post may contain affiliate links. Meaning a commission is given should you decide to make a purchase through these links, at no cost to you. All products shown are researched and tested to give an accurate review for you.